Protecting Your Garden with Eco-Friendly, Sustainable Solutions Against Typical Pests and Diseases

Protecting Your Garden with Eco-Friendly, Sustainable Solutions Against Typical Pests and Diseases

Gardening is not just about nurturing plants; it’s about fostering an ecosystem that thrives in harmony with nature. However, pests and diseases can often pose challenges, threatening the health and beauty of your garden. The good news is that you don’t need to rely on harsh chemicals to protect your green space. By adopting eco-friendly and sustainable solutions, you can keep your garden flourishing while safeguarding the environment. 1. Embrace Natural Predators Encouraging beneficial insects like ladybugs, lacewings, and spiders can help control common garden pests such as aphids, mites, and caterpillars. Birds, frogs, and even bats can also play a significant role in maintaining the ecological balance. By creating a habitat that attracts these natural predators—such as planting diverse flowers, providing water sources, and avoiding pesticides—you’ll foster a healthy, self-regulating garden ecosystem. 2. Use Organic Fertilizers and Soil Health Boosters Healthy soil leads to healthy plants that are more resistant to pests and diseases. Incorporate compost, vermicompost, and organic fertilizers to enrich the soil. Products like Enriched Vermi Lite and Green Ville from Green Era are excellent choices, offering essential nutrients while improving soil structure and water retention. 3. Implement Crop Rotation and Companion Planting Rotating crops each season disrupts pest and disease cycles, reducing their prevalence. Companion planting—the practice of growing certain plants together—can also deter pests. For example, planting marigolds with vegetables can repel nematodes, while basil can help keep mosquitoes and flies at bay. 4. Utilize Eco-Friendly Pest Control Products Opt for natural pest control solutions like neem oil, insecticidal soaps, and biological pesticides. Products such as Neem A Oil, Gurad 360, and Fungo Guard from Green Era offer effective, residue-free protection against a variety of garden pests. These solutions are safe for plants, beneficial insects, and the environment. 5. Regular Monitoring and Early Intervention Keeping a close eye on your plants helps you catch pest infestations and diseases early, allowing for targeted intervention. Regularly inspect leaves, stems, and soil for signs of trouble. Removing affected plant parts or manually picking pests can prevent larger outbreaks without the need for chemicals. 6. Foster Biodiversity and Plant Variety A diverse garden is less susceptible to widespread pest and disease problems. Mix different types of plants, including flowers, herbs, and vegetables, to attract various beneficial insects and create a balanced ecosystem. Native plants are especially resilient, as they are adapted to local conditions and pests. 7. Maintain Proper Watering and Plant Care Practices Overwatering or improper spacing can lead to fungal diseases and attract pests. Water your plants early in the day to allow leaves to dry, and ensure adequate air circulation by spacing plants appropriately. Mulching can also help retain soil moisture while preventing weed growth and soil-borne diseases. Protecting your garden doesn’t mean compromising the environment. By using sustainable, eco-friendly methods, you can create a thriving, resilient garden that stands up to pests and diseases while promoting biodiversity and environmental health. Embrace these green solutions and enjoy the rewards of a healthy, vibrant garden season after season. For more eco-friendly gardening tips and products, explore Green Era’s range of sustainable solutions designed to keep your garden flourishing naturally.

Neem Oil Sustainable Tool for Gardening

Neem Oil – A Sustainable Tool for Gardening

Deep-rooted in the heart of the Indian subcontinent, the neem tree, scientifically known as Azadirachta indica, stands as a botanical marvel. Revered as the “Divine Tree” and “Nature’s Pharmacy,” the neem tree has a rich history and remarkable properties, particularly in the realm of gardening. In this comprehensive exploration, we delve into the world of neem, with a focus on neem oil for plants. We will unveil the origins of neem oil, the plant components used in its extraction, its pivotal role in gardening, and its extraordinary prowess in pest management. The Essence of Neem Oil: Neem oil, often referred to as the crown jewel among neem derivatives, is a prized extract primarily obtained through the cold-pressing of neem kernels. Within the neem fruit, seeds house a treasure trove of bioactive compounds. Neem oil has earned global acclaim for its multifaceted properties, making it an indispensable asset across various industries, with gardening taking center stage. The primary plant parts employed for neem oil extraction are the seeds. These seeds hold a rich repository of biologically active compounds, with azadirachtin being the standout ingredient responsible for many of neem oil’s beneficial attributes. The extraction process of neem oil is meticulously conducted to preserve its therapeutic and pesticidal qualities. Diving Into Neem’s Historical Significance: To truly grasp the rich history of neem, it is imperative to appreciate its multifaceted roles in traditional medicine and everyday life. For over two millennia, neem has been an integral part of Indian Ayurveda, renowned for its therapeutic properties. From treating skin ailments to promoting digestive health, neem has been hailed as a panacea in traditional medicine systems. Beyond its agricultural significance, neem is intricately woven into daily life. Its leaves serve as natural air purifiers, while its twigs have traditionally been used as toothbrushes, promoting oral hygiene. The bark, rich in tannins, finds utility in tanning leather and preserving fishing nets. Neem’s historical importance transcends borders, as its utility and cultural significance continue to resonate globally. Use in Gardening: The utilization of neem oil in gardening represents a milestone in sustainable farming practices, and its adoption has proliferated due to several pivotal advantages. 1. Natural Pesticide: Neem oil emerges as a potent neem-based pesticide, providing protection to crops against a wide array of agricultural pests i.e. Aphids, Mealy bugs, caterpillars, mites, beetles, and more meet their match in neem oil, while beneficial insects such as bees, butterflies and ladybugs remain won’t harmed. This characteristic makes neem oil ideal for integrated pest management (IPM) strategies. 2. Biodegradability: Neem-based insecticides are celebrated for their biodegradability. In stark contrast to synthetic pesticides that linger in the environment and harm non-target organisms, neem-based solutions naturally break down, reducing the ecological footprint of gardening. 3. Safety for Humans and Animals: Neem oil exhibits a high degree of safety for humans and animals alike, rendering it a sustainable and eco-friendly option for crop protection. Gardeners benefit from reduced exposure to harmful chemicals. Also Read: 10 Easy Steps to Start with Organic Gardening Role of Neem In Pest Control: The role of neem in pest control is nothing short of a revolution. Neem-based pesticides and insecticides, derived from neem oil and neem extracts, have emerged as champions in the quest for eco-friendly and effective pest management. These products showcase a spectrum of properties, including repellence, growth disruption, and reduced feeding in target pests. Crucially, they inflict minimal harm on non-target organisms and the environment, aligning seamlessly with the principles of sustainable farming. As gardening to meet the challenges of the 21st century, the enduring importance of the neem tree in the agricultural realm remains steadfast. Neem and its derivatives, particularly neem oil, play a pivotal role in striking the delicate balance between safeguarding crops and preserving the environment. In light of the global shift toward sustainable and organic farming practices, neem stands as a guiding light, bridging the gap between nature and science, and steering us toward food security and environmental sustainability. Neem Oil’s Contribution to Overcoming Pest Resistance: One of the remarkable attributes of neem oil is its capacity to counter the resistance that some pests develop against synthetic pesticides over time. This phenomenon, known as pesticide resistance, poses a significant challenge in modern gardening. However, neem-based pesticides, armed with a complex array of bioactive compounds, function differently from their synthetic counterparts. They disrupt various facets of a pest’s life cycle, including feeding behavior, growth, and reproduction. This multi-pronged approach makes it arduous for pests to develop resistance to neem-based solutions. Furthermore, neem-based pesticides can serve as a valuable component in integrated pest management (IPM) programs. These programs combine diverse pest control methods, reducing reliance on chemical pesticides and further mitigating the risk of resistance development. Consequently, neem oil not only effectively controls pests but also addresses the persistent issue of pesticide resistance in gardening and gardening. Assessing Neem Oil’s Quality: Evaluating the quality of neem oil is imperative to ensure its efficacy across various applications, particularly in gardening. Here are several key quality characteristics to consider when scrutinizing neem oil for plant care: 1. Fragrance: High-quality neem oil should possess a robust, distinctive, and somewhat pungent odor. This fragrance is often likened to that of garlic or nuts. The presence of this characteristic scent signifies the abundance of active compounds, including azadirachtin, which contributes to its pesticidal properties. 2. Solubility in Water: Quality neem oil should demonstrate excellent solubility in water. This property assumes significance in the creation of emulsifiable concentrates, frequently used in gardening to blend neem oil with water for applications. Complete solubility ensures even distribution and effective coverage on plants. 3. Certification: In India, the Central Insecticides Board (CIB) certification serves as a hallmark of quality assurance for agricultural inputs, including neem-based pesticides. A neem oil product bearing CIB certification has undergone rigorous testing and meets established quality standards, establishing it as a dependable choice for gardeners. 4. Shelf Life: Neem oil should boast a reasonably extended shelf life when stored correctly. High-quality neem oil remains stable

Tips to Grow Rose Plants Faster at Home

Tips to Grow Rose Plants Faster at Home

Are you looking to grow beautiful, vibrant rose plants in your home garden? Roses are radiant and ravishing flowers, and with the right care and attention, you can encourage their growth and achieve faster results. In this blog post, we will provide you with practical tips and guidance on how to grow rose plants faster at home. From proper care techniques to selecting the best fertilizer, this comprehensive guide will help you create an environment that promotes healthy growth and abundant blooms. Setting the Foundation for Success: Before diving into the specifics of growing roses faster, it’s crucial to establish a strong foundation. Start by selecting a suitable location that receives ample sunlight, preferably at least six hours a day. Roses thrive in full sunlight, which contributes to their vigorous growth. Additionally, ensure that the soil is well-draining, fertile, and rich in organic matter. Incorporating compost or well-rotted manure into the soil improves its nutrient content and structure, creating an ideal environment for your rose plants. Care Techniques for Accelerated Growth: 1. Planting and Watering: When planting your rose plants, dig a hole larger than the root ball to allow the roots to spread freely. Ensure that the bud union is level with or slightly above the soil surface. After planting, water thoroughly to settle the soil and eliminate air pockets. Regular watering is essential, keeping the soil consistently moist but not waterlogged. 2. Pruning: Regular pruning is crucial for stimulating growth and abundant blooms. Prune during the dormant season or after flowering, depending on the rose variety. Remove dead, damaged, or crossing branches, as well as weak growth. Pruning encourages new shoots and improves overall plant health. 3. Mulching and Weed Control: Applying a layer of organic mulch around the base of your rose plants helps conserve moisture, suppress weeds, and regulate soil temperature. Mulch also adds nutrients to the soil as it breaks down, benefiting the rose plants. Also Read: 10 Beautiful Flower Plants for Balcony in India The Best Fertilizers For Rose Plants: Choosing the right fertilizer plays a vital role in promoting faster growth and vibrant blooms in rose plants. Here are a few excellent options to consider: 1. Organic Rose Fertilizers Organic fertilizers, such as compost, well-rotted manure, or fish emulsion, provide essential nutrients to your rose plants while improving soil health. These natural options release nutrients slowly, ensuring steady growth and reducing the risk of burning the plants. 2. Organic Plant Growth Promoters Flowering plant growth promoters are essential tools for gardeners and farmers seeking to maximize the productivity and health of their plants. These substances are designed to stimulate and enhance various aspects of plant growth, ultimately leading to increased yields, better-quality flowers, and overall improved plant vigor. One notable example of such a growth promoter is “Grow Me Fast,” an organic plant growth promoter that has gained popularity among eco-conscious gardeners. This innovative product is formulated with natural ingredients and bio-stimulants, which work in synergy to promote root development, increase nutrient uptake, and stimulate flowering. “Grow Me Fast” stands out for its commitment to organic and environmentally friendly gardening practices. It harnesses the power of beneficial microorganisms and essential nutrients to create a conducive environment for plants to thrive. By enhancing root growth, it enables plants to access water and nutrients more efficiently, resulting in stronger and more resilient plants. Furthermore, this organic growth promoter contains no harmful chemicals or synthetic additives, making it a safe choice for both home gardeners and commercial growers. Its effectiveness in promoting rapid and healthy plant growth, combined with its eco-friendly credentials, makes “Grow Me Fast” a valuable addition to the toolkit of anyone looking to cultivate flourishing flowering plants while minimizing their environmental impact. 3. Slow-Release Fertilizers  Slow-release fertilizers are convenient options for rose plants, as they release nutrients gradually over an extended period. This ensures a steady supply of essential elements for continuous growth and flowering. Conclusion Growing rose plants faster at home requires proper care, attention, and the right choice of fertilizer. By providing optimal growing conditions, including sunlight, well-draining soil, and regular watering, you can set the stage for accelerated growth. Remember to prune your roses, apply organic mulch, and control weeds to maintain a healthy environment. When it comes to fertilizers, organic options, balanced granular fertilizers, and slow-release formulas are all effective choices. By following these tips and recommendations, you can enjoy vibrant and flourishing rose Frequently Asked Questions (FAQs)

The Power of Root Promoters, Stimulators, and Boosters

The Power of Root Promoters, Stimulators, and Boosters

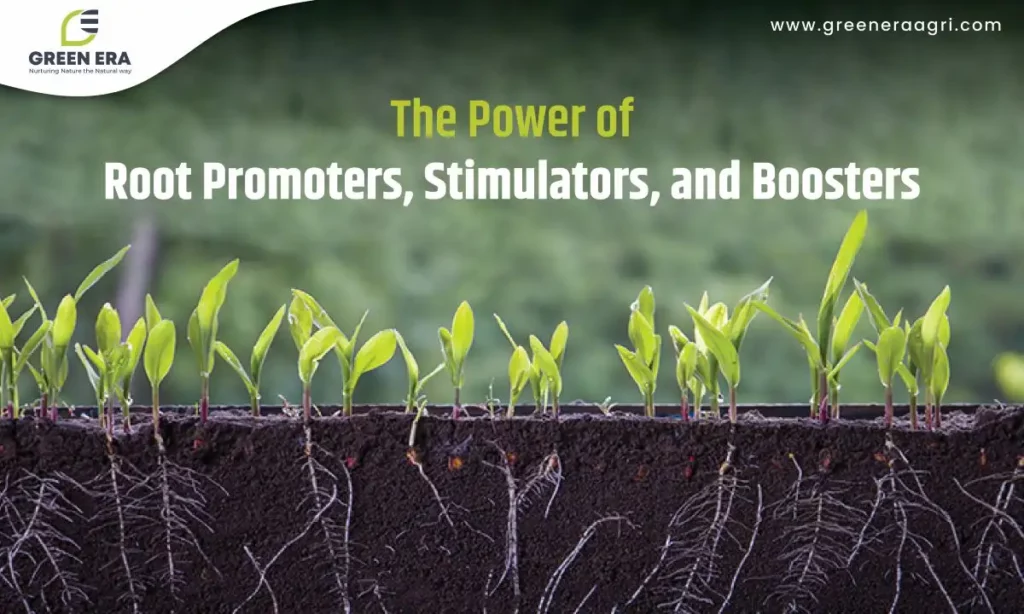
In the realm of gardening, achieving optimal plant growth is essential for maximizing yields and ensuring the overall health of plants. A key factor in this equation is the development of robust and healthy root systems. Plant root growth promoters, stimulators, and boosters play a vital role in this process, aiding plants in their quest for nutrients and water uptake. In this extended blog, we will delve into the science behind these essential tools, highlighting their significance in modern agriculture and how they contribute to sustainable farming practices. What Are the Consequences of Poor Root Growth? Neglecting root development can have far-reaching and detrimental consequences on the health and productivity of plants. When root growth is stunted or underdeveloped, a cascade of challenges arises, profoundly impacting the overall well-being of the plant. Understanding Root Growth Enhancement 1. Plant Root Growth Promoter: A Catalyst for Root Development Plant root growth promoters are formulated products that contain various compounds designed to stimulate and enhance root growth. These promoters work by activating specific biochemical pathways within the plant, encouraging the formation of new roots and root hairs. Key ingredients often found in root growth promoters include auxins, cytokinin’s, and gibberellins, which are plant growth hormones that play pivotal roles in root development. Auxins: Coordinating Growth and Direction Cytokinins: Orchestrating Root Meristem Formation Gibberellins: Boosting Growth Above and Below Ground 2. Plant Root Growth Stimulator: Nurturing Root Health Root growth stimulators, while similar to promoters, often focus on maintaining root health and resilience in challenging environmental conditions. These products contain nutrients and bio-stimulants that improve root vitality, making them more resistant to stressors like drought, disease, and nutrient deficiencies. Root stimulators often contain mycorrhizal fungi, beneficial bacteria, and humic substances. 3. Plant Root Booster: Fuelling Nutrient and Water Uptake Plant Root boosters are specifically designed to enhance the plant’s ability to absorb nutrients and water from the soil. They typically contain compounds that improve the soil’s nutrient-holding capacity, reduce compaction, and increase root surface area. Here is one stop solution – Root Rex Conclusion The role of plant root growth promoters, stimulators, and boosters covers imp aspects of any plant’s life. These products empower farmers and gardeners to maximize crop yields, reduce water and nutrient wastage, and enhance plant resilience in the face of environmental challenges. When utilized correctly and in conjunction with sound agricultural practices, these tools become invaluable assets in the quest for higher yields, healthier crops, and a more sustainable future for agriculture. Whether you’re a commercial farmer or a home gardener, understanding and implementing these root-enhancing solutions can make a substantial difference in your plant’s overall health and productivity. With organic options like Root Rex available, you can promote root growth while adhering to environmentally friendly and sustainable practices, ensuring a brighter future for agriculture. Frequently Asked Questions (FAQs)

How To Grow Money Plant At Home Faster

How To Grow Money Plant At Home Faster

The Money Plant, also known as Devil’s Ivy or Pothos, is a popular houseplant cherished for its beautiful foliage and air-purifying qualities. If you’re looking to grow a Money Plant at home and want to expedite its growth, you’ve come to the right place. In this blog post, we’ll provide you with valuable tips and techniques to help your Money Plant thrive and grow faster. Whether you choose to grow it in water or soil, we’ll cover all the essential care guidelines to ensure a flourishing Money Plant in your home. Growing Money Plant in Water for Faster Growth To grow Money Plant in water, select healthy stem cuttings with at least two or three leaves. Make sure the cuttings are around 6 to 8 inches in length. Place the stem cuttings in a glass or jar filled with clean, chlorine-free water. Ensure that at least one node is submerged in the water, as this is where the roots will emerge. Money Plants thrive in bright, indirect light. Place the glass or jar in a well-lit location, but avoid direct sunlight as it can damage the leaves. To maintain optimal conditions, change the water every one to two weeks. This prevents the water from becoming stagnant and promotes healthy root growth. Growing Money Plant in Soil for Faster Growth Select a well-draining pot with drainage holes to prevent water logging. Use a well-balanced potting mix that retains moisture while allowing excess water to drain away. Take stem cuttings, around 6 to 8 inches long, and remove the lower leaves. Plant the cuttings in the soil, ensuring that at least one node is buried to encourage root growth. Place the potted Money Plant in a location with bright, indirect light. Maintain a temperature range between 60°F and 85°F (15°C to 29°C) for optimal growth. Water the Money Plant when the top inch of soil feels dry. Avoid overwatering, as it can lead to root rot. Allow the soil to dry slightly between watering to prevent waterlogged conditions. Also Read: 10 Best Indoor Plants for a Happy Home Caring for Money Plant for Faster Growth Money Plants prefer bright, indirect light but can tolerate lower light conditions. Placing them near a north or east-facing window is ideal. Maintain a moderate room temperature and average humidity levels. Avoid exposing the plant to cold drafts or extreme temperature fluctuations. Regularly trim the Money Plant to encourage bushier growth and prevent leggy vines. Pinch off the tips of the stems to promote branching and fuller foliage. Feed the Money Plant with a balanced liquid fertilizer diluted to half strength. Apply the fertilizer every two to four weeks during the growing season (spring and summer) to enhance growth. Conclusion Growing a Money Plant at home can bring beauty and a touch of greenery to your living space. By following the tips provided in this blog post, you can ensure faster growth for your Money Plant, whether you choose to grow it in water or soil. Remember to provide adequate light, maintain proper watering practices, and provide regular care and maintenance. With patience and attention to detail, your Money Plant will thrive and become a delightful addition. Frequently Asked Questions (FAQs)

15 Easiest Vegetables to Grow at Home in India

15 Easiest Vegetables to Grow at Home in India

­Home gardening has taken root across the globe, and India is no exception. The satisfaction of nurturing plants and reaping the rewards of homegrown vegetables is a joy like no other. Whether you’re an experienced gardener or a novice, this guide introduces the 15 easiest vegetables to cultivate at home in the India. Each vegetable is accompanied by its unique growing requirements, essential care tips, and potential challenges to help you embark on a successful gardening journey. The 15 Easiest Vegetables To Cultivate At Home In India 1. Tomatoes Tomatoes are a staple in many Indian dishes, making them a popular choice for home gardeners. To ensure a thriving tomato crop, provide your plants with a sunny spot that receives 6-8 hours of sunlight. Well-draining soil enriched with compost or organic matter is essential. Consistent watering, ideally at the base of the plant, helps prevent diseases. Pruning the lower leaves and providing support for vines encourages healthier growth and better fruit production. Keep an eye out for common pests like aphids, whiteflies, and tomato hornworms. 2. Green Beans Whether you opt for bush or pole beans, these vegetables are easy to grow in India’s warm climate. Plant them in a location that receives full sunlight. Well-draining soil and regular watering are crucial for successful growth. Bush beans mature quickly, while pole beans require trellises or supports for vertical growth. Regular harvesting not only provides you with fresh produce but also encourages continuous flowering. Watch for pests such as aphids and whiteflies and use natural deterrents like neem oil. 3. Radishes Radishes are perfect for impatient gardeners as they mature within a month. Sow the seeds directly in well-draining soil and water consistently to prevent the roots from becoming woody. Regular thinning of seedlings ensures proper spacing and encourages healthier growth. Protect your radishes from root maggots by using row covers. The vibrant foliage may also attract flea beetles, so keep an eye out for any signs of damage. 4. Spinach Spinach is a versatile leafy green packed with nutrients. While it thrives in cooler temperatures, it can withstand slightly warmer conditions. Sow the seeds in well-draining soil and provide partial shade during hotter months. Regularly harvesting outer leaves promotes continuous growth. Protect against pests like leaf miners and aphids by using insecticidal soap or neem oil. 5. Cucumbers Cucumbers are known for their vigorous growth and refreshingly crisp texture. Choose a sunny spot with well-draining soil and provide ample space for vines to spread. Trellises or supports save space and prevent fruit rot. Consistent watering is crucial, especially as the fruits begin to develop. Regularly inspect for pests such as cucumber beetles and powdery mildew. 6. Bitter Gourd Bitter gourd, or karela, is a common vegetable in Indian cuisine. Plant bitter gourd in a warm and humid environment, ensuring it receives plenty of sunlight. Support the vines as they grow by providing trellises or stakes. Harvest young and tender fruits to enjoy their mild bitterness. Keep an eye out for common pests like fruit flies and spider mites, which can damage the leaves and fruits. Also Read: How to Start Your Backyard Garden – Step-by-Step Guide 7. Bottle Gourd Bottle gourd, or lauki, is another warm-season favorite. These vines can be trained to grow vertically, saving space in your garden. Well-draining soil and full sunlight are essential for healthy growth. Young bottle gourds are tender and ideal for cooking. Protect against powdery mildew and fruit flies, which are common challenges for bottle gourds. 8. Chilies India’s love for spice makes growing chilies a rewarding endeavor. Choose from a range of mild to hot varieties based on your preference. Plant them in a location that receives full sunlight and ensure well-draining soil. Pruning your chili plants promotes better air circulation and higher fruit yield. Protect against aphids, whiteflies, and fruit borers, which can damage the developing chilies. 9. Coriander Coriander, or dhania, adds a burst of flavor to Indian dishes. Grow coriander from seeds in well-draining soil with partial sunlight. Regularly harvest the outer leaves to prevent the plant from bolting (going to seed). Keep an eye out for aphids and fungal diseases that can affect the leaves. 10. Fenugreek Fenugreek, or methi, is a versatile herb and green used extensively in Indian cooking. Sow fenugreek seeds directly in pots or garden beds with well-draining soil. Both the leaves and seeds are edible. Regularly trim the plants to encourage bushier growth and prevent early flowering. Protect against aphids and fungal issues that can impact the leaves. 11. Carrots Carrots thrive in loose, well-tilled soil. Sow carrot seeds directly in the ground or containers with good drainage. Consistent watering is crucial for preventing cracked roots. Thinning the seedlings ensures adequate space for the roots to develop properly. Watch out for carrot flies and aphids, which can damage the foliage. 12. Onions Onions can be started from seeds or kitchen scraps, making them a sustainable choice. Provide well-draining soil and moderate sunlight. Bulb formation takes time, often several months, but the outcome is worth the wait. Guard against onion thrips and fungal diseases by practicing good hygiene and providing adequate air circulation. 13. Okra Okra, or bhindi, thrives in warm temperatures. Sow the seeds directly in well-draining soil and ensure they receive full sunlight. Provide support for the tall plants as they grow to prevent them from falling over. Regular harvesting of young pods promotes continuous flowering and fruiting. Protect against common pests like aphids, caterpillars, and fruit borers. 14. Mint Mint is a robust herb with a tendency to spread rapidly. To prevent it from taking over your garden, grow mint in containers. Partial sunlight is sufficient for its growth. Regularly trim the leaves to promote bushier growth. Keep an eye out for spider mites and fungal issues that can affect the leaves. 15. Pumpkin Pumpkins require ample space due to their sprawling vines. Choose a sunny location with well-draining soil and provide consistent watering. Be patient, as pumpkins take time

How to Start Your Backyard Garden - Step-by-Step Guide

How to Start Your Backyard Garden – Step-by-Step Guide

Do you dream of having your very own garden right in your backyard? Well, guess what? You can make that dream come true! Backyard gardening is a wonderful way to connect with nature, learn about plants, and grow your own fruits and vegetables. We will explore how to start a small backyard garden. So put on your gardening gloves, grab a shovel, and let’s get started on this exciting adventure! Step By Step Guide – How To Start Backyard Garden Step 1: Choose a Spot The first step in starting a backyard garden is to find the perfect spot. Look for an area in your yard that gets plenty of sunlight throughout the day. Plants need sunlight to grow big and strong. Make sure the spot is also easily accessible so that you can water your plants and take care of them. It’s important to pick a spot with good soil that drains well. You can do a simple soil test by digging a small hole and filling it with water. If the water drains away within a few hours, then you have good soil! Step 2: Plan Your Garden: Now that you have your spot, it’s time to plan your garden. Think about what you want to grow. Do you want to grow colorful flowers or yummy vegetables? Make a list of the plants you want in your garden. Consider their sizes and how much space they need to grow. You can draw a simple sketch of your garden and decide where each plant will go. This will help you stay organized and make the most of your space. Step 3: Prepare the Soil: Next, it’s time to prepare the soil for your plants. Use a garden fork or shovel to loosen the soil and remove any weeds or rocks. You can also add some compost or organic matter to make the soil richer and provide nutrients for your plants. Mix the compost into the soil using your hands or a garden trowel. This will create a nice, fertile bed for your plants to grow in. Also Read: Why Plant Protection Spray Is Important? Step 4: Plant Your Seeds or Seedlings: Now comes the fun part – planting! If you have seeds, read the instructions on the seed packet to know how deep to plant them and how far apart they should be. Make small holes in the soil with your finger or a small stick and gently place the seeds inside. If you have seedlings, which are baby plants already started in small pots, dig holes in the soil that are big enough to accommodate the roots. Place the seedlings in the holes and cover the roots with soil. Water your plants gently after planting to help them settle in. Step 5: Water and Care for Your Plants: Watering is essential for the growth of your plants. Give your garden a good drink of water after planting, and then water regularly depending on the needs of your plants. Some plants need more water, while others need less. Check the soil by touching it with your finger. If it feels dry, it’s time to water. Be careful not to overwater, as too much water can drown the roots. In addition to watering, take care of your plants by removing any weeds that may sprout up. Weeds compete with your plants for nutrients and can hinder their growth. You can gently pull them out by hand or use a small garden tool. Step 6: Watch Your Garden Grow: As you water and care for your garden, you will start to see your plants grow and flourish. It’s an exciting sight! Keep an eye out for any pests or bugs that may try to eat your plants. If you spot any, you can use natural methods like picking them off or spraying them with a mixture of water and soap. Remember to be patient. Plants take time to grow, and each one has its own pace. Enjoy the process of watching your garden thrive and be proud of your green thumb! Conclusion: Starting a backyard garden is a wonderful adventure that allows you to connect with nature and grow your own plants. By following these simple steps, you can create a small garden right in your backyard. Remember to choose a sunny spot, plan your garden, prepare the soil, plant your seeds or seedlings, water and care for your plants, and watch them grow. Gardening is a journey of patience and discovery, so have fun and enjoy the beauty of nature unfolding in your own backyard! Frequently Asked Questions (FAQs)

10 Easy Steps to Start with Organic Gardening

10 Easy Steps to Start with Organic Gardening

Indoor plant maintenance calls for focus, endurance, and a little bit of expertise. You can give your indoor plants the care they require to flourish by adhering to these 15 crucial procedures. Your efforts will be rewarded with healthy, colorful, and growing indoor plants if you understand their requirements, keep an eye out for pests, water judiciously, and maintain a suitable atmosphere. So, enjoy being a plant parent, and watch your indoor oasis grow! Here’s A Guide On How To Start An Organic Garden. 1. Understand Organic Gardening Basics: Begin by familiarizing yourself with the principles of organic gardening. It involves nurturing the soil, using organic fertilizers and vermicompost, promoting biodiversity, and avoiding synthetic pesticides and herbicides. Embrace the concept of working in harmony with nature to create a thriving ecosystem in your garden. 2. Select the Right Location: Choose a sunny spot in your yard or balcony for your organic garden. Most plants require at least 6-8 hours of direct sunlight each day. Ensure the area has access to water and is away from potential contaminants like industrial pollution or chemical runoff. 3. Prepare the Soil: Healthy soil is the foundation of a successful organic garden. Test your soil’s pH level and nutrient content. Amend the soil with organic matter such as compost, well-rotted manure, or leaf mold to improve its structure, fertility, and moisture-holding capacity. 4. Plan Your Garden Layout: Sketch a layout of your garden, considering factors like plant spacing, companion planting, and crop rotation. Place taller plants on the north side to avoid shading smaller ones. Group plants with similar water and sunlight requirements together for efficient watering and care. 5. Choose Organic Seeds or Seedlings: Select organic seeds or seedlings from reputable sources. Organic seeds are free from synthetic chemicals and genetically modified organisms (GMOs). Opt for heirloom varieties, which are open-pollinated and offer diverse flavors and characteristics. 6. Plant and Mulch: Follow the planting instructions for each plant, including proper spacing and planting depth. After planting, apply a layer of organic mulch, such as straw, shredded leaves, or compost, around the plants to suppress weeds, conserve moisture, and improve soil health. 7. Water Wisely: Water your plants deeply and infrequently to encourage deep root growth. Use a watering can or a drip irrigation system to deliver water directly to the plant’s root zone, minimizing water loss through evaporation. Avoid overhead watering to prevent leaf diseases. 8. Implement Organic Pest Management: Promote biodiversity by attracting beneficial insects, birds, and pollinators to your garden. Use organic pest control methods like handpicking pests, introducing beneficial insects, applying homemade insecticidal soaps or plant-based repellents, and creating physical barriers. 9. Practice Natural Weed Control: Keep weeds at bay by regularly hand-pulling them or using tools like hoes or weeders. Mulching with organic materials will also help suppress weed growth. Avoid chemical herbicides, as they can harm beneficial organisms and contaminate the soil. 10. Maintain and Nourish Your Garden: Regularly inspect your plants for signs of disease or nutrient deficiencies. Prune, stake, and train your plants as needed for proper growth. Feed your garden with organic fertilizers like compost, worm castings, or organic plant-based fertilizers to replenish soil nutrients. Conclusion: Embarking on an organic gardening journey is both rewarding and fulfilling. By following these 10 easy steps, you can lay a strong foundation for your organic garden. From understanding the basics of organic gardening to selecting the right location, preparing the soil, choosing organic seeds, and implementing organic pest and weed control, your garden will flourish in harmony with nature. Embrace the joy of growing your own food organically and enjoy the benefits of a sustainable and environmentally friendly garden. Happy organic gardening! Also Read: 10 Best Benefits of Vermicompost for Plants Boost Your Garden’s Health Frequently Asked Questions (FAQs)

10 Best Indoor Plants for a Happy Home

10 Best Indoor Plants for a Happy Home

Did you know that plants can bring life and happiness to your living room? Having indoor plants not only adds beauty to your home but also helps create a healthy environment. In this blog, we will explore the ten best indoor plants that are perfect for your living room. Get ready to discover these green companions. The 10 Best Indoor Plants That Are Perfect For Your Living Room 1. Spider Plant: The spider plant is a fun and easy-to-grow plant with long, arching leaves that look like spider legs. It purifies the air by removing harmful toxins and adds a touch of green to your living room. Plus, it produces baby spider plants that you can share with your friends! 2. Peace Lily: The peace lily is a beautiful plant with glossy, dark green leaves and elegant white flowers. It’s known for its ability to clean the air and thrive in low-light conditions. Just like its name suggests, the peace lily brings a sense of calmness and tranquility to your living room. 3. Snake Plant: The snake plant, also known as mother-in-law’s tongue, is a tough and hardy plant. It has long, upright leaves with yellow edges that resemble a snake’s skin. This plant is great for busy households as it can tolerate low light and requires minimal care. It’s like having a reliable friend in your living room! 4. Pothos: Pothos is a popular indoor plant with heart-shaped leaves that come in various shades of green. It is known for its trailing vines that can beautifully cascade from hanging pots or shelves. Pothos is easy to care for and adds a touch of nature’s artwork to your living room. 5. Rubber Plant: The rubber plant is a sturdy plant with large, glossy leaves that have a rubbery texture. It can tolerate low light and is an excellent air purifier. The rubber plant’s shiny leaves reflect light, making your living room feel brighter and more vibrant. Also Read: 10 Best Herbs To Grow At Home 6. Aloe Vera: Aloe vera is a unique plant with thick, spiky leaves filled with a gel-like substance. It’s not only a great addition to your living room but also a helpful plant for minor burns and cuts. Just remember, aloe vera loves sunlight, so place it near a sunny window. 7. Boston Fern: The Boston fern is a feathery and lush plant that loves humidity, making it perfect for the living room. Its fronds add a touch of green and create a refreshing atmosphere. Remember to mist the leaves occasionally to keep the fern happy and healthy. 8. Chinese Evergreen: The Chinese evergreen is a beautiful plant with variegated leaves in shades of green, silver, or red. It thrives in low-light conditions and is known for its air-purifying qualities. The Chinese evergreen brings a splash of color and elegance to your living room. 9. ZZ Plant: The ZZ plant is a low-maintenance plant with shiny, dark green leaves that grow in a graceful pattern. It can tolerate low light and irregular watering, making it perfect for busy households. The ZZ plant adds a touch of sophistication to your living room. 10. Dracaena: Dracaena plants come in various shapes and sizes, but all of them have long, slender leaves that create a dramatic effect. They thrive in medium to bright light conditions and are excellent air purifiers. The dracaena’s unique appearance adds a touch of style to your living room. Conclusion: Having indoor plants in your living room is like inviting nature’s beauty and freshness into your home. Spider plants, peace lilies, snake plants, and pothos are just a few examples of wonderful plants that can brighten up your living space. Remember to water them, provide them with enough light, and give them lots of love. With these green companions, your living room will become a cozy and vibrant sanctuary for you and your family to enjoy! Frequently Asked Questions (FAQs)

Shopping Cart
Scroll to Top